
How I draw a pencil portrait of a child
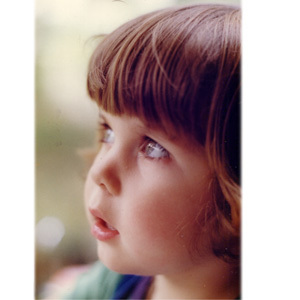
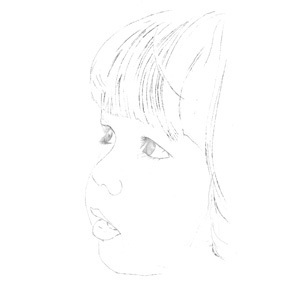
Start by sketching out the form I start by sketching out the basic form and proportions of the portrait using a light pencil line which can be easily erased or corrected if necessary. A B-Grade pencil is a good choice because it is soft enough a leave mark on the paper but not over-dominant. A harder pencil, 2H for example, could leave a depression in the paper surface making it difficult later to correct any mistakes. A life-like portrait requires that key proportions are correct in order to look realistic, so take time at this early stage to get the structure correct.
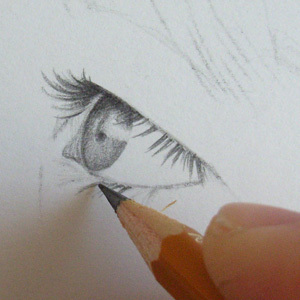
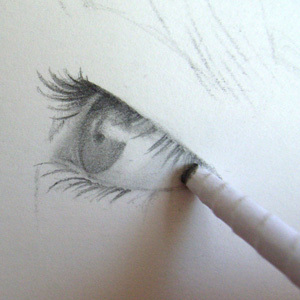
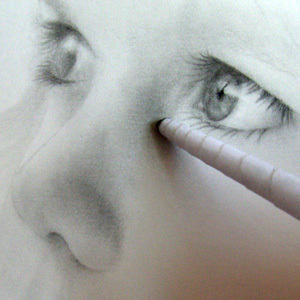
Focus on the eye detail The starting point for most of my portraits are the eyes because they convey our expressions and inner character. Get the eyes right and the rest of the portrait should follow. Additional detail and blending will come later as the portrait develops and bring the portrait to life.
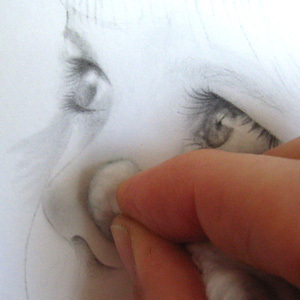
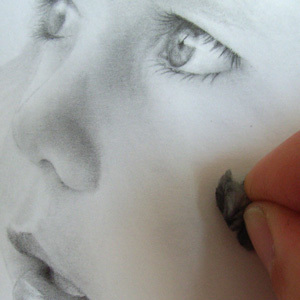
The nose After the eyes comes the nose. Cotton wool is a useful tool for blending shadows. You need to first pick up some graphite dust onto the cotton wool by rubbing it over an area of graphite on the portrait itself or on a separate sheet of paper. Then gently brush it over the portrait following the contours of the face. I'll later use a tortillon to add more defined tones. The contours of the face are starting to appear with the skin tones.
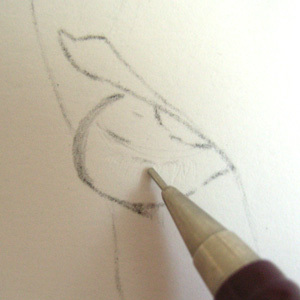
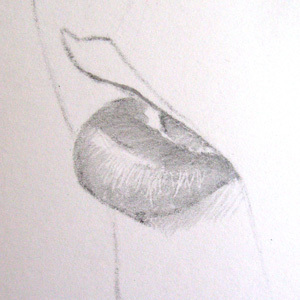
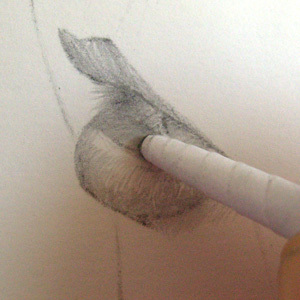
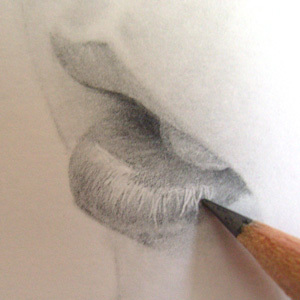
How to draw the mouth The outline of the mouth is first drafted out. I then use a blunt end of a mechanical-pencil to indent an impression of the light reflections of the lower lip. When pencil is then drawn over the top, the indentations are retained as white lines. Remember that the mouth is an extension of our face and not simply stuck on. Try and curve and blend the edges of the mouth into the face contours.
Using a tortillon ( a tightly rolled piece of paper with the end softened by sand-paper) I blend the pencil around the form of the lips. Using a 4B pencil, depth and detail is then added.
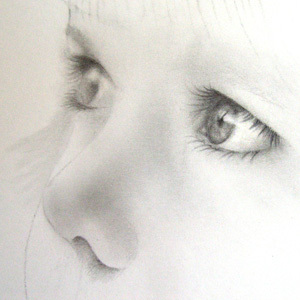
Blending and shadows Using the tortillon and cotton wool blending tools again, the rest of the skin tones are gradually added to the face. The portrait is now starting to look like a face.
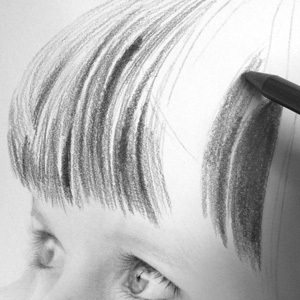
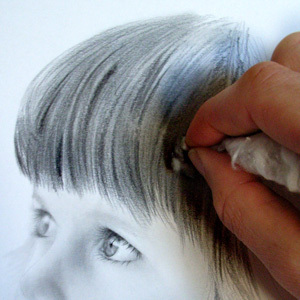
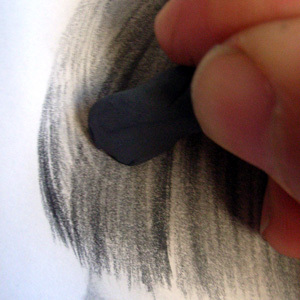
How to draw hair To block in larger areas of shadow in the hair I use a graphite stick. The cotton wool comes in handy again to blend the hair to give it a softer look. A soft art eraser is kneaded to form a narrow edge tool to remove fine lines of graphite for the hair and reflections. The whole process of adding shadow, blending and removal continues until the hair looks correct.
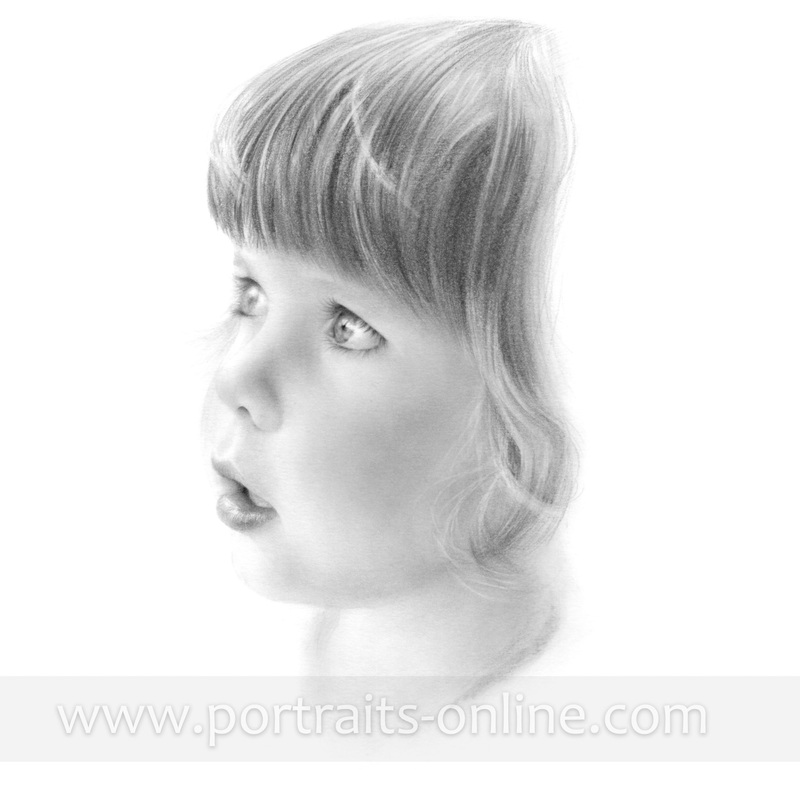
The portrait is complete! It often requires a short time away from the portrait before you can really say it is complete because you can become too drawn into the detail without seeing the whole. I often let a portrait stand for a day and then come back with fresh eyes to see if the portrait looks 'correct# or not. Please remember that the quality of the image and the detail you see on your computer screen are not necessarily the same as the quality of the actual original portrait. http://www.portraits-online.com/art-blog/how-to-draw-a-portrait
Comments are closed.
|
Categories
All
ArchiveS
February 2015
|

 RSS Feed
|
UK 056 03 02 50 40
DE 08651 / 9749107 |
|
|
Chris Mosley. 81 Nethermoor Lane, Killamarsh, Sheffield, S21 1BZ United Kingdom | This site uses Cookies: Privacy Policy | Terms & Conditions | ©2017 Chris Mosley All Rights Reserved
|